
Ignition switch is the most crucial switch in the car circuit. It is the control hub of each circuit branch. This component can freely dominate the ignition coil. There are four ignition positions: START, ON, ACC, LOCK. Among them, the "START" should not be connected for a long time because of the high working current. It cannot be positioned by itself during operation.
The bad ignition switch will cause severe problems because it controls the ignition coil. If the ignition switch is faulty, the car can not start. The engine can't be ignited and shut down. The vehicle stalls for unknown reasons. And the circuit controlled by the key can not be put into practice. How do these things happen? Let's take a look.
Some symptoms are the result of the drivers' long-term wrong habits. Some new drivers, who are in a hurry, simplify many steps while starting the car. They even insert the key into the ignition switch from the parking position directly to the ignition position.
Here is something we need to know. The four positions of the ignition switch are progressive. The electrical equipment enters the working state one by one to relieve the burden of the car battery caused by the instantaneous power.
If we directly turn the key to the ignition position, it will instantly increase the load on the battery. This behavior is very harmful to the battery and the engine. As time goes by, it will shorten the battery's service life and cause the engine to be difficult to start.
So what's the correct way to start the engine? Slowly twist the key and let the electrical accessories on the vehicle enter the state one by one. Relieve the pressure on the battery power supply.

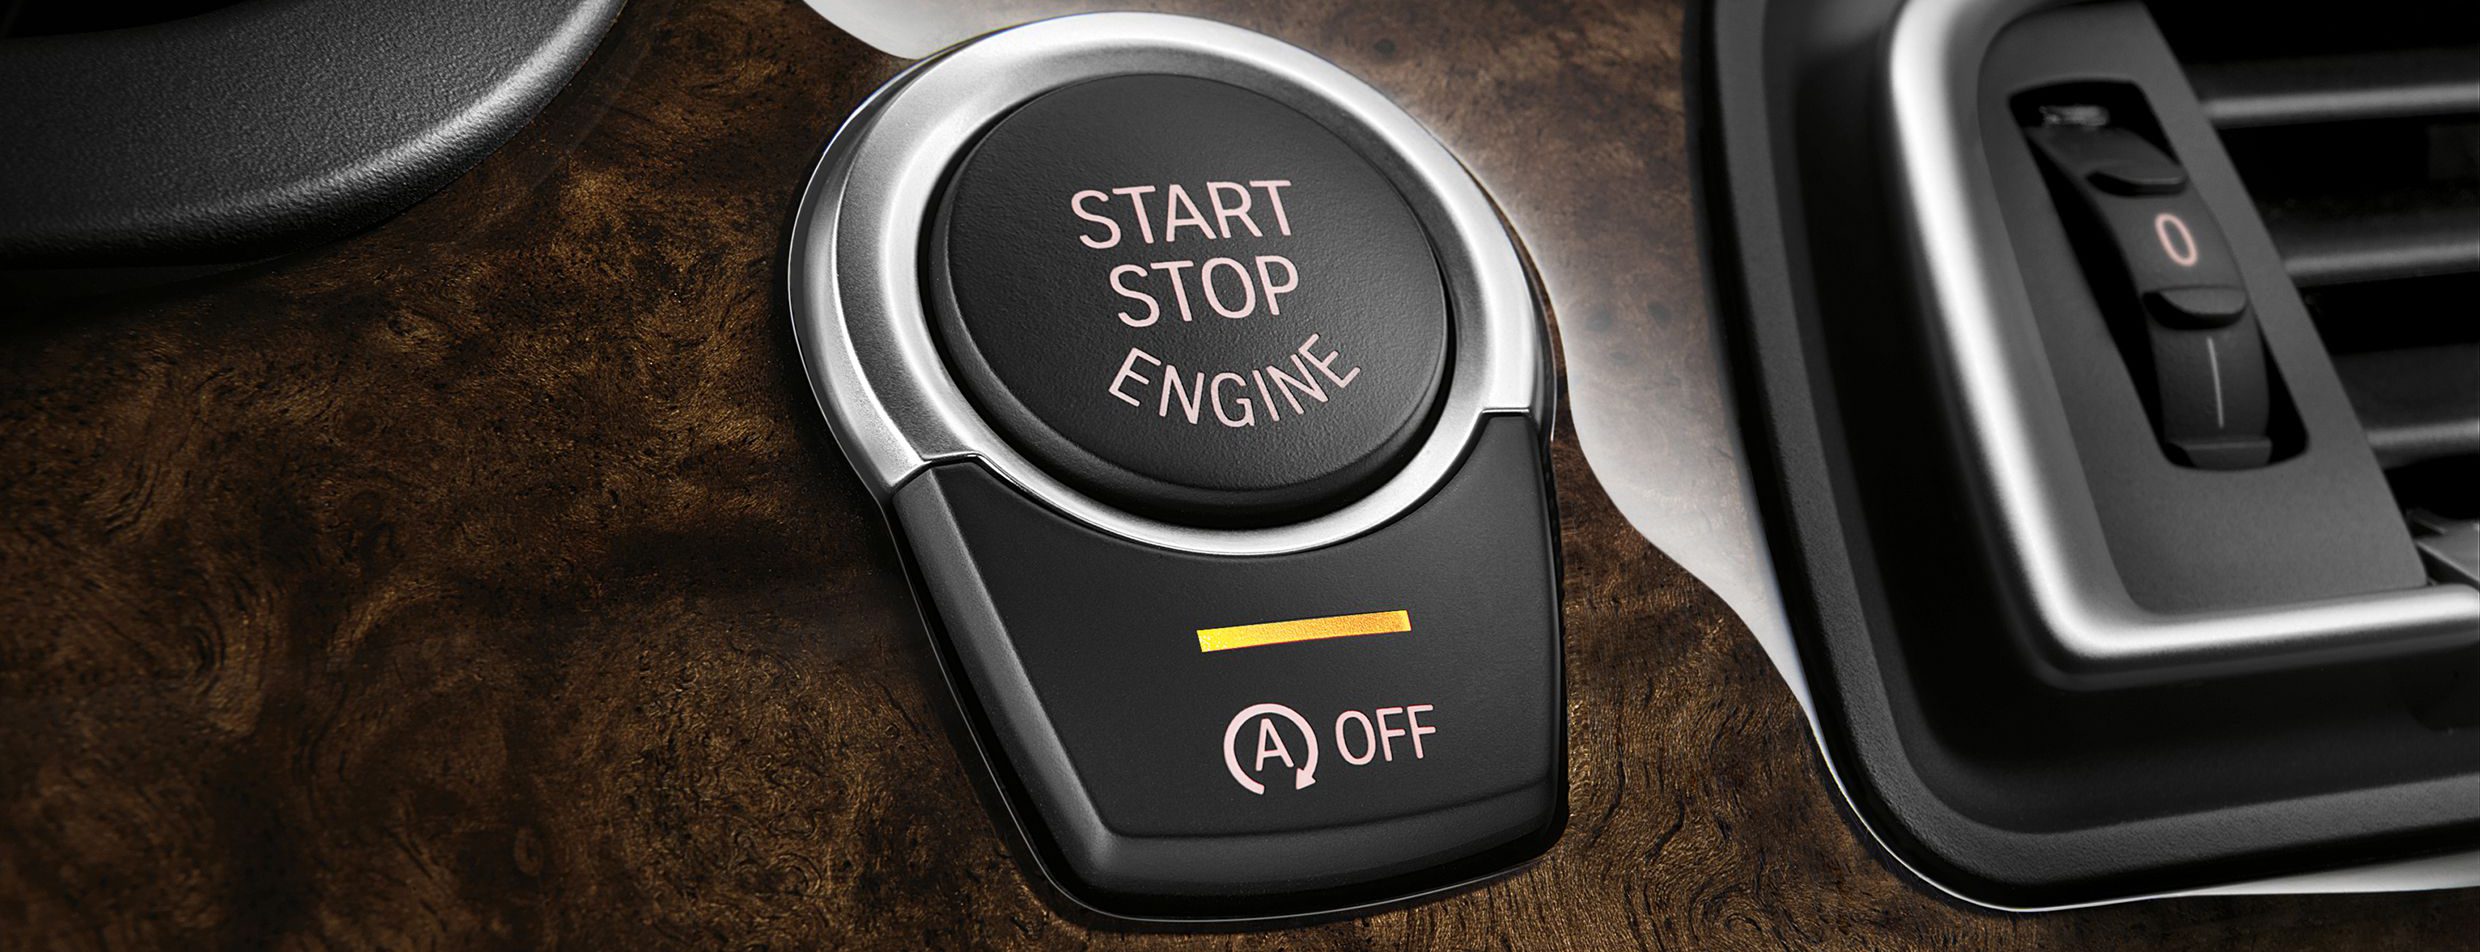
For a car with one button starting, you can press it first to start the engine. Then press it again, the dashboard light will come on, equivalent to the "ON" position. The car will check itself automatically. The fuel pump builds up oil pressure. All things are ready for the ignition. Finally, the vehicle gets started.
In this case, we can use the decoder to diagnose. After reading the trouble code, use the multimeter to check the wire according to the information prompted.
Check and rule out original parts. If the fault is found in the wire, you can temporarily avoid suspecting the original parts issues.
After ruling out the wire, Read the trouble code. If the code still exists, if the wire is good at this time, we can go to check original parts. Note that before using the multimeter to test the circuit, first check the battery voltage. Low voltage can also lead to the failure of ignition.
The car ignition switch has four positions: "START, ON, ACC, LOCK". In the locking state, The steering can't work at all. The whole electricity supply is cut off at the same time. In the "ACC" state, the power of some electrical devices, such as CD and air conditioner, are turned on.
In the "ON" state during daily driving, all circuits of the whole car are in working condition. The "START" position takes charge of the engine starting. It will automatically return to the normal state after starting.

If the key doesn't stop for a while in other gears when the engine starts and goes directly from LOCK to START, it will instantly increase the load on the battery. At the same time, it is difficult for the computer to command the engine because the electrical equipment has not yet fully entered the working state.
So this kind of operation is terrible for the battery and the engine. As time goes by, it shortens the battery's service life and causes the starting problem and carbon deposits.
When the engine starts, the starter doesn‘t work. The possible faults are as follows.
● Power-supply failure
Symptoms include severe battery power loss, sulphated pole plate, short circuit, poor contact between the battery pole pile and the wire clip, poor contact due to loose connection of the starter wire, etc.
● Starter failure
Symptoms include poor contact between the commutator and brushes, broken or short circuit in the excitation winding or armature winding, insulated brush lap, broken or short circuit in the solenoid switch coil, contact ablation, etc.
● Starter relay failure
Symptoms include the broken or short circuit in the starter relay coil and bad contact.
● Defective ignition switch
Symptoms include loose wire or poor internal contact in the ignition switch.
● Starter circuit failure
There is a broken circuit in the starter circuit. Poor contact and loose wire have bad effects on the smooth operation.
The car's electronic-controlled engine failure analysis requires a lot of service experience, especially service in the oil and gas circuit failure. Because the oil and gas circuit failure is challenging to diagnose by the EFI engine fault self-diagnosis system.
At the same time, the failure rate is relatively high in the electronically controlled engine failure.
The electronically controlled gasoline injection engine is an intelligent control engine equipped with a computer, sensors and actuators. It can precisely control the air-fuel ratio to make complete combustion and significantly reduce exhaust pollution.
At the same time, the noise can be reduced because the engine's working stability is enhanced. Sensors collect the signals of instantaneous change of air intake, engine load, water temperature and air intake temperature into the computer.
The computer calculates the timely and proper gasoline volume and the best ignition advance angle. It outputs the control signal to the injection valve and ignition so that the engine can get the best performance under each working condition.

For checking the air gap, the method is: align the convex teeth of the signal rotor with the core of the sensor coil. Use the feeler gauge to check the air gap. The gap is generally 0.2~0.4mm.
If it does not fit, adjust it. For some non-contact distributors, this air gap is not adjustable. It can only be replaced when there is a problem.
Press the starter switch when the starter doesn't work. Turn on the headlights or press the horn to check whether the circuit has power.
If the headlight doesn't keep on and the horn doesn't sound, check whether the battery have no power or broken circuit. If the headlight is on and the horn sounds, the battery has power.
At this time, you can use the screwdriver to lap the two posts of the starter switch. If the starter idles, there is a problem with the starter switch.
If the starter fails to work and is accompanied by strong sparks, there is a short circuit or lap inside the starter. If there is neither rotation nor sparks, the starter has a broken circuit inside.
If the ignition switch is turned to the over-action position, the starter relay makes a slight sound. The contacts close and connect to the starter terminal circuit. The relay circuit works normal.
When checking the solenoid switch, use one end of the wire to connect to the battery terminal of the starter switch. The other end connects to the coil terminal of the solenoid switch.
If the starter works, it means that the solenoid switch and the starter circuit are good. And the circuit from the relay to the solenoid switch is not working. If there is still no response, use the screwdriver to connect the main circuit of the starter.
If the starter works, it means that the internal circuit of the starter is normal. The reason may be that the solenoid switch coil is broken, poor contact, or the movable iron core is stuck and cannot move. The switch should be further overhauled or replaced.
If the starter still does not move, a broken internal circuit exists. The suction circuit and pulling coil do not work. There is no magnetic force generated. The active iron core can't be sucked, so the electromagnetic switch does not work. The starter should be disassembled to repair.
For checking the induction coil, use the resistance block of the multimeter to measure the resistance of the signal output of the distributor (induction coil). The value is generally 250 ~ 1500Ω, but there are also 130 ~ 190Ω. If the resistance is infinite, the coil is disconnected.
If the resistance is too large or too small, it is necessary to replace the ignition sensor assembly. The voltage output from the induction coil can be measured with the AC voltage block of the high-sensitivity multimeter. The value should be 1.0~1.5V.
For more practical skills on testing and maintaining automotive parts, don’t forget to look at other blogs. You can find everything to keep the engine running smoothly, over at Delcoribo.
 Lauritz Carolsfeld
  November 08, 2021