
How to solve the fault of the car charging system, of course, checking the charging system is inevitable, the following inspection steps of the car charging system are as follows.
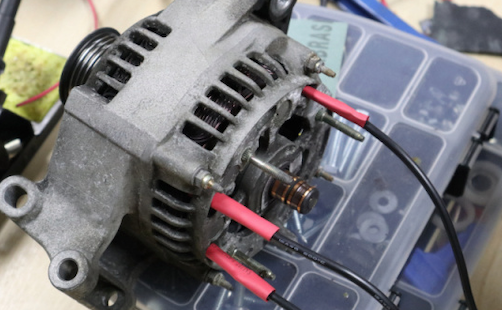
1. Check the transmission belt and wire connection of the alternator. If the belt is aging, carbonized, loose, these problems will cause the belt to slip, send out abnormal sound. If the bearing is damaged, the alternator works normally and produces running noise. In serious cases, the rotor and stator will come into contact with friction, causing serious heating of the alternator and failure of the charging system.
2. Turn on the ignition switch and do not start the engine. If the charging indicator is not on, unplug the wiring harness of the alternator. Use one end of test lamp to ground and the other end of test lamp to measure "L" end of the alternator. If the charging indicator can be turned on at this time, it can be determined the alternator has faults. If the charging indicator is still not on, it indicates a short circuit or damaged bulb. Then check the charging indicator circuit and the charging indicator bulb on the dashboard based on the circuit diagram of the charging system.
3. Check the charging indicator. Turn on the ignition switch and do not start the engine. When the charging indicator light is on, unplug the wire harness plug of the motor, and the charging indicator light should go out. The voltage at the "L" end of the plug should be the battery voltage. If the charging indicator does not go out, it can be determined there is a ground fault in the circuit. Check the charging indicator light circuit according to the circuit diagram of the charging system to troubleshoot the fault of the circuit.
4. If the charging indicator can be on, start the engine running at medium speed and the charging indicator should be off. If it cannot be go out, or it go out after unplugging the motor plug, the alternator can be judged to have a fault, repair or replace the alternator.
5. Check and record the battery voltage when turning off the ignition switch. Then connect the alternator plug and run the engine at a moderate speed. The measured voltage should be higher than the voltage before starting the engine, around 13.8V. If the measured voltage is lower than the voltage before starting the engine or higher than 14.5V, the alternator fault can be determined.
6. The voltage between the alternator housing and the negative electrode of the battery should not exceed 0.5V. If it is more than 0.5V, check the battery negative and the engine ground circuit to ensure a reliable connection, clear the resistance at the contact point, and tighten all joints.
7. The voltage between the positive pole of the battery and alternator output terminal should not exceed 0.5V. If more than 0.5V, check the line between the battery positive pole and the alternator output terminal to ensure a reliable connection, clear the resistance at the contact point, and tighten all connectors.
 James Smith
  September 28, 2020